

The Perfect Thanksgiving Turkey
Thanksgiving is one of the most beloved holidays of the year, and at the heart of many family gatherings is the Thanksgiving turkey. A golden-brown, perfectly roasted turkey is the highlight of the dinner table, and getting it just right can be a challenge even for experienced cooks. Whether you’re hosting your first Thanksgiving or you’ve been preparing turkey for years, ensuring that your turkey turns out juicy and flavorful requires attention to detail and a few important tips.
One of the most significant steps in preparing a Thanksgiving turkey is ensuring that it remains moist throughout the cooking process. Dry turkey is one of the most common complaints, but with the right approach, you can avoid this outcome and delight your guests with a succulent bird. Let’s walk through the process of making a juicy Thanksgiving turkey, from preparation to cooking tips.
Prepping the Turkey: The Brining Process
Brining your turkey is one of the best methods to lock in moisture and enhance its flavor. A brine is essentially a saltwater solution that helps the turkey absorb more liquid, preventing it from drying out during cooking. You can use a basic brine made of water and salt, or add extra flavors such as herbs, spices, and citrus for a more aromatic touch.
Ingredients for a Simple Brine:
- 1 cup of kosher salt
- 1/2 cup of sugar (optional)
- 1 gallon of water
- Optional: garlic cloves, rosemary, thyme, lemon slices, and black peppercorns
To brine your turkey:
- Dissolve the salt (and sugar, if using) in water. If you want to add more flavor, simmer the herbs, garlic, and spices in a portion of the water to infuse them, then let the mixture cool.
- Submerge the turkey completely in the brine and refrigerate it for at least 12 hours (preferably overnight).
- After brining, rinse the turkey thoroughly under cold water and pat it dry. This step is important to avoid an overly salty turkey.
Preparing the Turkey for the Oven
After brining, let the turkey rest in the fridge for a couple of hours to dry out the skin. Dry skin helps you achieve a crispy, golden exterior, which is just as important as keeping the meat moist and juicy.
Before placing the turkey in the oven, season the inside cavity with salt, pepper, and any herbs or aromatics you prefer. Common choices include:
- Onion quarters
- Garlic
- Fresh thyme, rosemary, or sage
- Lemon halves or orange slices
Rubbing softened butter or oil all over the turkey’s skin also helps with flavor and browning. You can add seasoning to the butter as well, such as garlic powder, smoked paprika, or herbs.
The Importance of Oven Temperature and Cooking Time
Cooking the turkey evenly is a delicate balance. Many people mistakenly cook the turkey at too high a temperature, which can lead to dry meat. A good approach is to cook the turkey at 325°F (163°C) to allow it to cook through slowly, giving it time to remain tender and juicy.

The general rule of thumb is to cook your turkey for 13–15 minutes per pound if it is unstuffed, or 15–20 minutes per pound if it is stuffed. However, one of the most reliable methods for determining if your turkey is done is using a wireless meat thermometers.
Using a Wireless Meat Thermometer for Perfect Results
A wireless meat thermometer can be a game changer for ensuring your turkey is cooked to perfection. Turkey must reach an internal temperature of 165°F (74°C) in the thickest parts (such as the breast and thighs) to be considered safe to eat, but it’s easy to overcook certain areas while others remain undercooked.
By using a wireless meat thermometer, you can monitor the internal temperature of your turkey without having to open the oven repeatedly. This ensures that you can track how well the bird is cooking, which helps you avoid overcooking it and losing all that moisture you worked to preserve.
Instead of guessing and hoping your turkey turns out perfect, you’ll have accurate data on hand. This is especially useful for larger birds, which can be trickier to cook evenly. With a wireless meat thermometer, you can even set alerts for when the desired temperature is reached, freeing you to focus on preparing side dishes or enjoying time with family.
Resting the Turkey: A Critical Step
Once the turkey has reached its desired temperature, it’s tempting to carve it right away and serve it hot. However, one of the most crucial steps is allowing the turkey to rest. Resting the turkey for at least 20–30 minutes after it comes out of the oven helps the juices redistribute throughout the meat, resulting in a juicier bird.
To keep the turkey warm while it rests, loosely tent it with aluminum foil. Avoid covering it too tightly, as this can cause the crispy skin to become soggy.
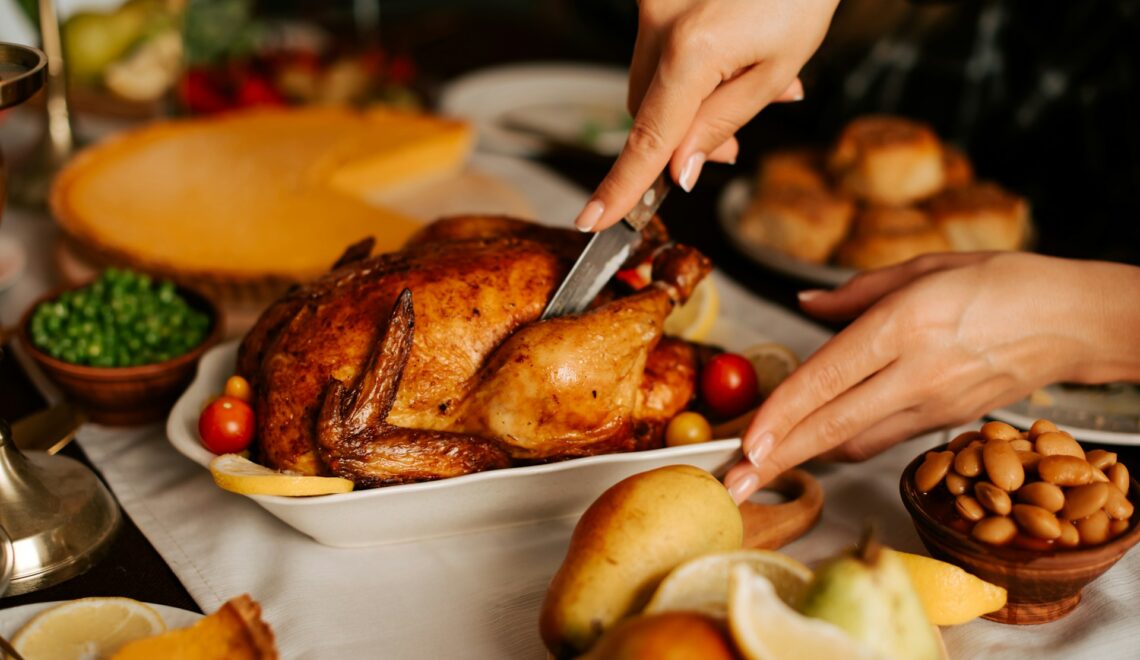
Carving the Turkey for Maximum Juiciness
Carving the turkey correctly is just as important as the cooking process. Start by removing the legs and thighs, then carve off the breasts. Slice the breast meat against the grain to ensure that each piece remains tender and easy to chew.
Make sure to keep the slices fairly thick to maintain moisture, and serve immediately to enjoy the turkey at its best.
Conclusion: Crafting the Perfect Thanksgiving Turkey
Making a juicy Thanksgiving turkey may seem like a daunting task, but with careful preparation, the right tools, and attention to detail, it’s achievable for anyone. Brining the turkey, using a wireless meat thermometer, and allowing it to rest are all essential steps in ensuring a flavorful and succulent bird.
By following these tips, you’ll not only impress your family and friends but also create lasting memories around the Thanksgiving table. And as always, remember to be patient with yourself. Cooking a turkey is a rewarding process, and with a little practice, you’ll perfect the art of the juicy Thanksgiving turkey.
More to Love!
Thanksgiving Decor Ideas We Love
7 Serotonin-Boosting Foods


